Payment Accounts
Add, manage, and review your bank accounts and crypto wallet accounts from the Payment Accounts tab.
Use the Payment Accounts tab to add your bank accounts and crypto wallet accounts, then review, edit, or delete existing accounts.
Prerequisites
- Sign in to the Localpayment Dashboard.
- Confirm your user account has settings permissions.
Navigation Path
Side Menu → Configurations → Client → Edit → Payment AccountsStep-by-Step Guide
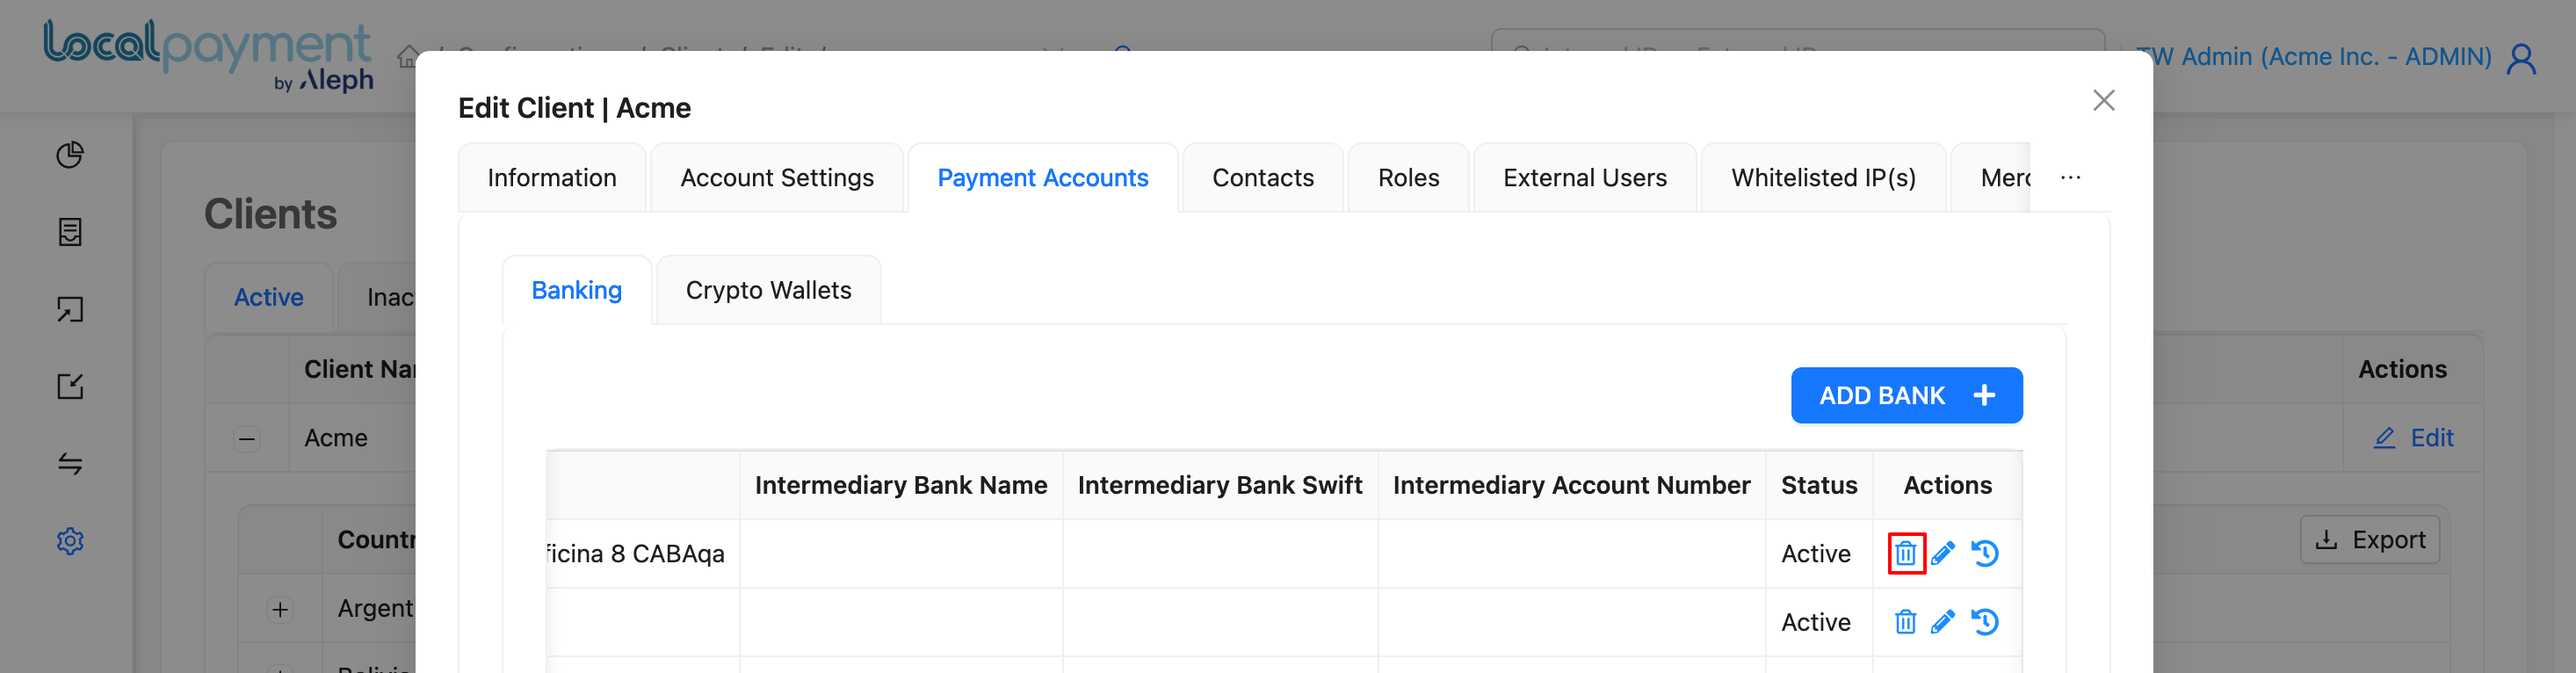
Add a bank account
- Go to Configurations.
- Select Clients.
- Click Edit to open your account settings.
- Open the Payment Accounts tab.
- Open the Banking tab.
- Click ADD BANK.
- Complete the bank account form:
- Transaction Type:
WireIn,WireOut, orAllto define whether the account is used for incoming wires, outgoing wires, or both - Country: select the country where the bank account is held
- Currency: select the currency used for this bank account
- Bank Name: enter the name of the bank
- Bank Address: enter the bank's address
- Swift / BIC: enter the SWIFT or BIC code for the bank
- Account Number / IBAN: enter the bank account number or IBAN
- ABA / Routing Number (optional): enter the routing number if the transfer requires one
- Beneficiary Name: enter the full name of the account beneficiary
- Beneficiary Address: enter the beneficiary's address
- Intermediary Bank Name (optional): enter the intermediary bank name if the payment route uses one
- Intermediary Account Number (optional): enter the intermediary account number if required
- Status:
ActiveorInactiveto control whether the account can be used
- Transaction Type:
- Click Save. The bank account is added to the client.
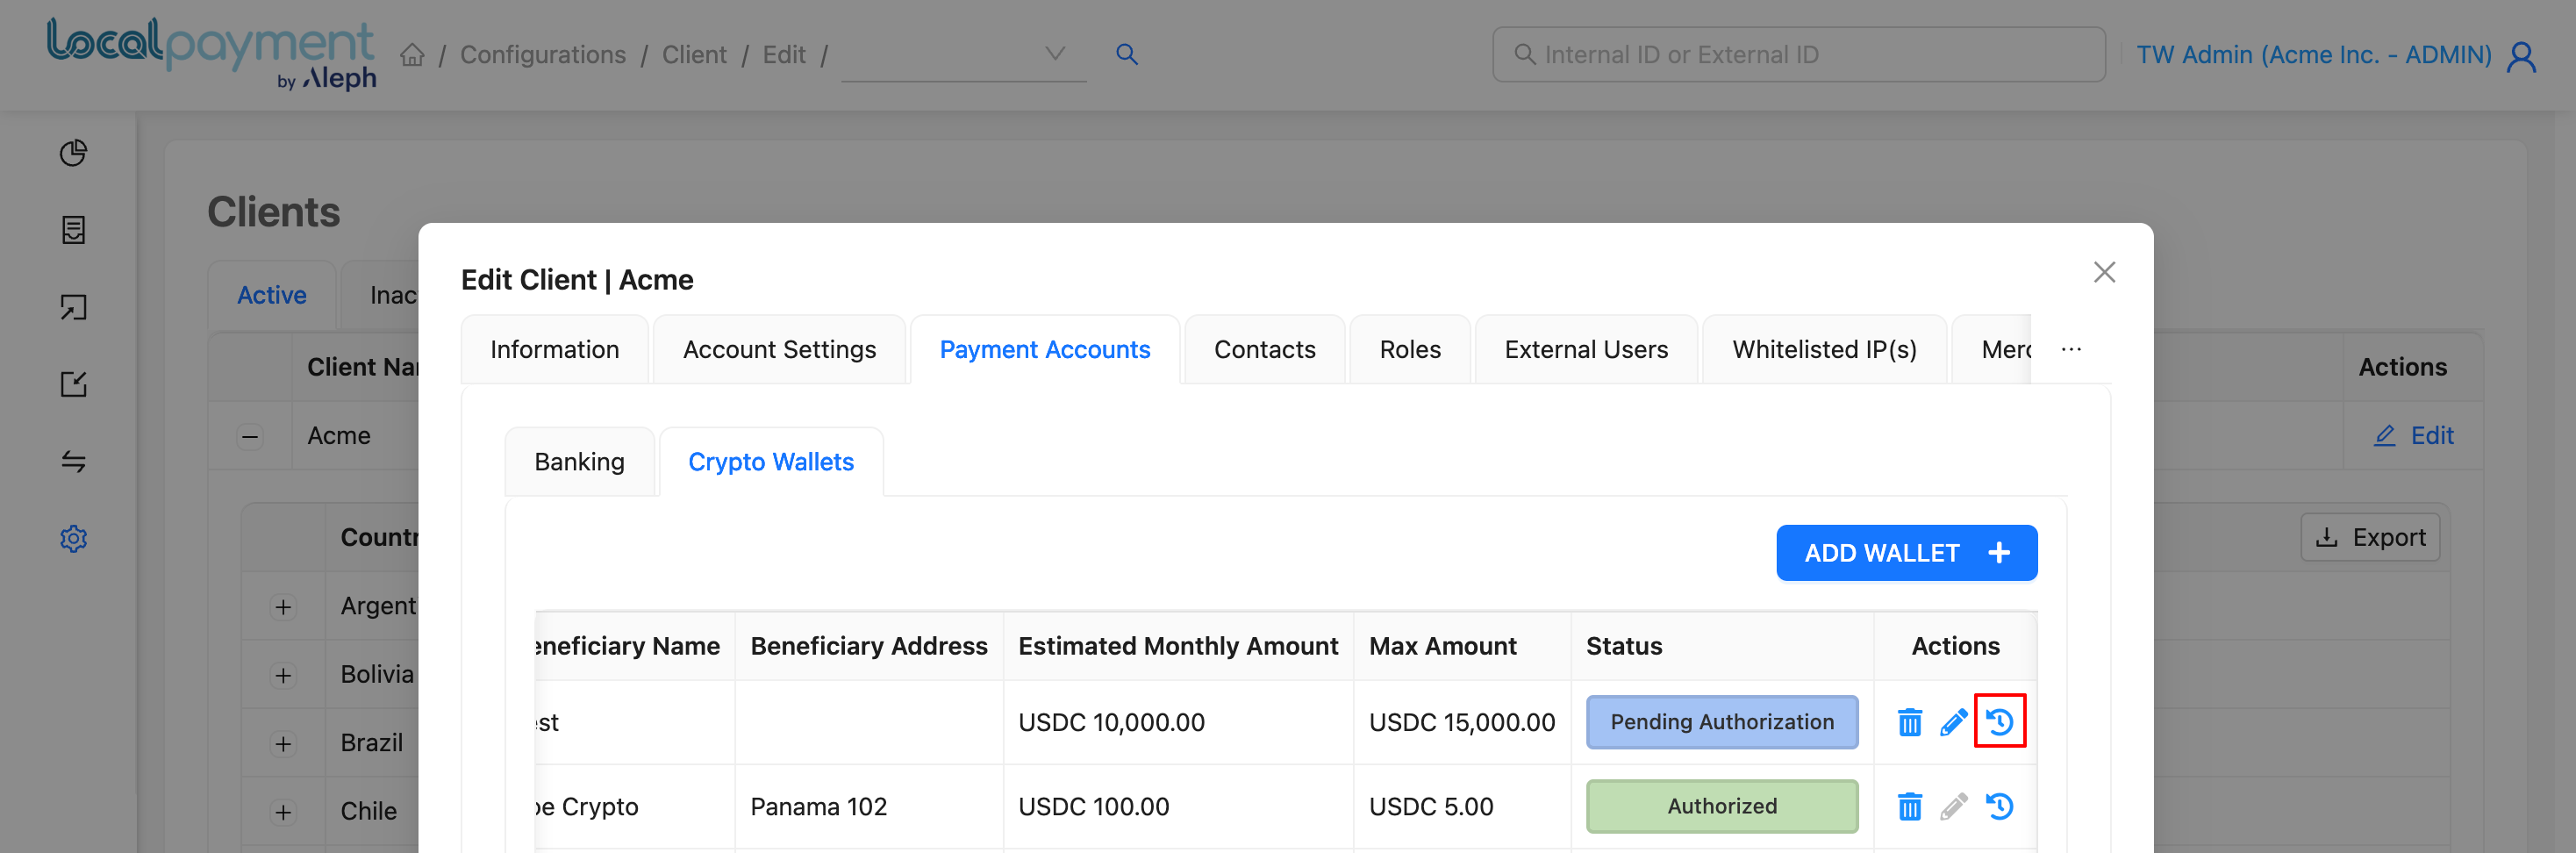
Add a crypto wallet account
- Go to Configurations.
- Select Clients.
- Click Edit to open your account settings.
- Open the Payment Accounts tab.
- Open the Crypto Wallet tab.
- Click ADD WALLET.
- Complete the wallet form:
- Transaction Type:
WireIn,WireOut, orAllto define whether the wallet is used for incoming transfers, outgoing transfers, or both - Network: select one of the available network options in the form, such as:
EthereumTronPolygonSolana
- Wallet Address: enter the wallet address for the selected network
- Currency: depends on the network you select (USDC or USDT)
- Beneficiary Name: enter the name of the wallet beneficiary
- Beneficiary Address (optional): enter the beneficiary address if needed
- Estimated Monthly Amount (optional): propose an expected monthly budget to be received in the wallet, enabling Compliance to make the assignment during the review.
- Transaction Type:
- Click Save. The wallet is created with Pending Authorization status and must be approved by the Compliance Team.
Important
- If the wallet is rejected, contact the support team.
- If a wire-in transaction is created while the wallet is in Pending Authorization, the transaction stays in
pending credituntil Compliance approves the wallet. If the wallet is rejected, the transaction moves toonhold_AMLto be returned.- If a wire-in transaction is created before the wallet is registered and authorized, the transaction stays in
pending credituntil the wallet is registered and authorized.- If a wire-in amount is higher than the amount approved by Compliance for the wallet, the transaction stays in
pending credituntil Compliance reviews it. Compliance then either approves the transaction or moves it toonhold_AMLto be returned.
Manage existing payment accounts
Edit a payment account
- Click the Edit icon for the account you want to update.
- Update the account details.
- Click Save.
Important
For crypto wallet accounts, you can edit the information only while the wallet is in Pending Authorization status.
Edit Bank

Edit Crypto Wallet

View account history
- Click the History icon for the account.
- Review the account details and change history, including the editor, action, and date.
Bank History

Crypto Wallet History
Delete a payment account
- Click the Delete icon next to the account.
- Click Yes in the confirmation message.
Delete Bank
Delete Crypto Wallet

Need Help? If you have questions about this process or any other feature, our support team is here for you. We can assist with troubleshooting, integration planning, and optimization.