Notifications Reports
Automate your reporting by configuring SFTP uploads or Email deliveries through the Localpayment Dashboard.
Prerequisites
Before you begin, ensure you have:
Access Requirements
- Valid credentials for the Localpayment Dashboard.
- User account with security settings permissions.
Technical Requirements
- SFTP: Server URL, credentials, port, path
- Email: Recipient address list
Navigation Path
Side Menu → Configurations → Client → Edit → Notifications → ReportsStep-by-Step Guides
Email Reports Notifications
-
Navigate to the Configurations module.
-
Within Configurations, select the Clients section.
-
Click the Edit option to open your account settings.
-
In your account settings, locate and select the Notifications tab.
-
Select Reports from the Notifications menu.
-
Choose the Email tab to configure email-based notifications.
-
Click the Add button.
-
Select the Report Name from the following options:
- Balance Report : Shows the balance after each transaction, along with the payment method, status, and payment details (amount, FX quote, taxes, etc.) for all completed transactions.
- Fides Report : Indicates the available balance once the transaction is completed; the transactions are grouped according to their origin (debit/credit).
- Details Report : This report contains all the details about a transaction, including the payers and beneficiaries.
- Activity Report : Provides all the details on every kind of transaction, including its status.
- Global Consolidation Report: Shows the balance after each transaction, along with the payment method, status, and payment details (amount, FX quote, taxes, etc.) for all completed transactions of a global account.
-
Select the Country field, and all available countries will appear.
-
Select an Account Number. This field lists all of your Localpayment accounts for the selected country. If you choose All in the Country field, you must also pick All in the Account Number.
-
Select your preferred Frequency for report delivery:
- Daily: Delivered every day at 2 a.m. GMT, containing all transactions from the previous calendar day (00:00 - 23:59 GMT).
- Weekly: Delivered every Monday at 3 a.m. GMT, containing all transactions from the previous full week (Monday to Sunday).
- Monthly: Delivered on the 1st of each month at 4 a.m. GMT, containing all transactions from the previous calendar month.
-
Select the File Type of the report from the following options: XLS or CSV.
-
Configure the File Name:
To use a custom name: Set the switch to Free String and enter the name in the File Name field.
To build a dynamic name: Set the switch to With Tags, then select a Separator and choose the Tags to assemble the filename.
-
Enter the To Email address that will receive the report notifications.
-
Finalize the process by clicking Confirm and a confirmation message will appear.
SFTP Reports Notifications
-
Navigate to the Configurations module.
-
Within Configurations, select the Clients section.
-
Click the Edit option to open your account settings.
-
In your account settings, locate and select the Notifications tab.
-
Select Reports from the Notifications menu.
-
Choose the FTP tab to configure email-based notifications.
-
Click the Add button.
-
Select the Report Name from the following options:
- Balance Report : Shows the balance after each transaction, along with the payment method, status, and payment details (amount, FX quote, taxes, etc.) for all completed transactions.
- Fides Report : Indicates the available balance once the transaction is completed; the transactions are grouped according to their origin (debit/credit).
- Details Report : This report contains all the details about a transaction, including the payers and beneficiaries.
- Activity Report : Provides all the details on every kind of transaction, including its status.
- Global Consolidation Report: Shows the balance after each transaction, along with the payment method, status, and payment details (amount, FX quote, taxes, etc.) for all completed transactions of a global account.
-
Select the Country field, and all available countries will appear.
-
Select an Account Number. This field lists all of your Localpayment accounts for the selected country. If you choose All in the Country field, you must also pick All in the Account Number.
-
Select your preferred Frequency for report delivery:
- Daily: Delivered every day at 2 a.m. GMT, containing all transactions from the previous calendar day (00:00 - 23:59 GMT).
- Weekly: Delivered every Monday at 3 a.m. GMT, containing all transactions from the previous full week (Monday to Sunday).
- Monthly: Delivered on the 1st of each month at 4 a.m. GMT, containing all transactions from the previous calendar month.
-
Select the File Type of the report from the following options: XLS or CSV.
-
Configure the File Name:
To use a custom name: Set the switch to Free String and enter the name in the File Name field.
To build a dynamic name: Set the switch to With Tags, then select a Separator and choose the Tags to assemble the filename.
-
Provide the following connection details:
Url, User, Port, and Path.
For authentication, enter a Pass or upload a Private Key file instead.
-
Finalize the process by clicking Confirm and a confirmation message will appear.
Managing Your Notifications
Modifying Existing Notifications
- Click the Edit icon for the desired notification configuration.
- Update the notifications' frequency, file type, file name, email, url, user, pass, private key, port, and path.
- Click Confirm to apply the changes.

Notification's History
- Click the History icon for the desired notification.
- The notification's details and a history of changes—including the editor, action, and date—will be displayed.

Removing Notification
- Click the Delete icon next to the notification you want to remove.
- Confirm the action by clicking OK.
- The notification will be immediately deactivated and removed from your configuration.

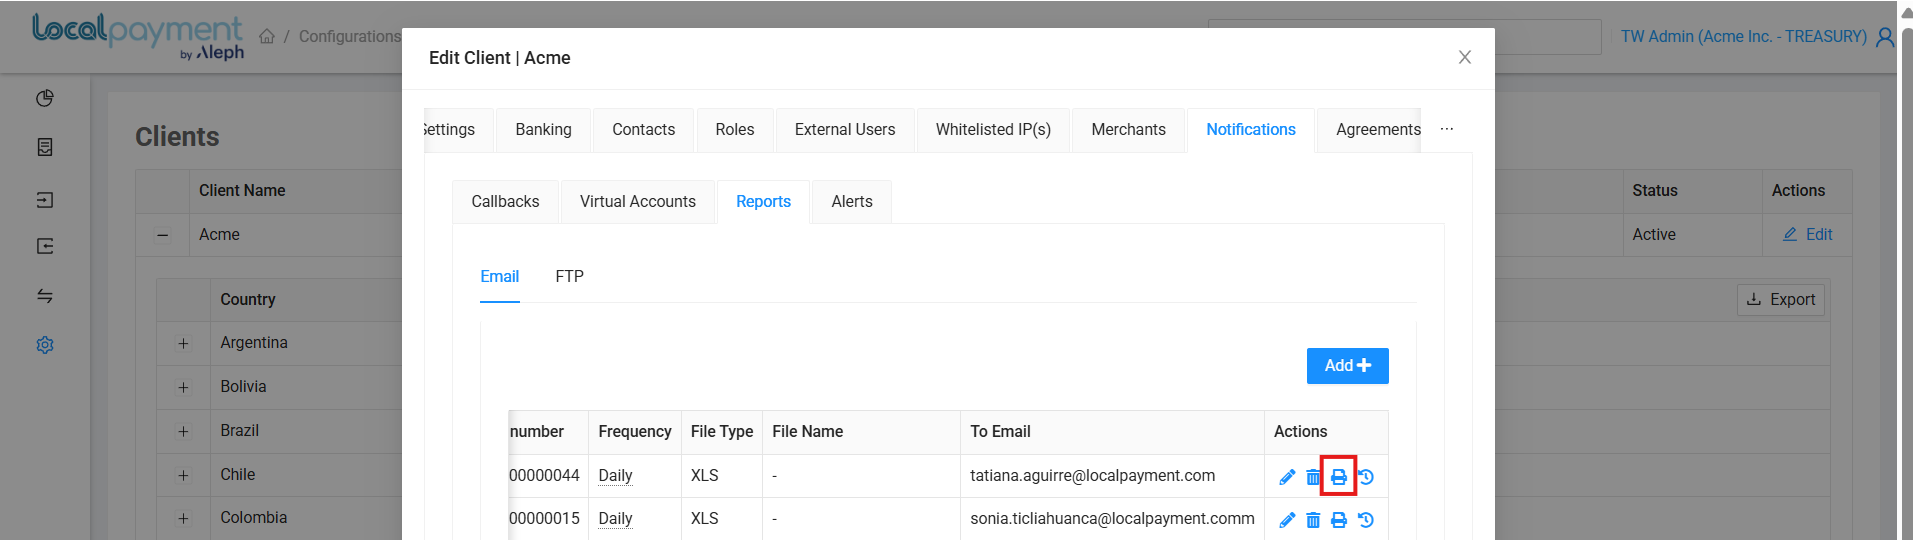
Testing Notification
- Click the Test Notification icon next to the notification you want to test.
- Select the time period for the report by setting a Date Range.
- Confirm the action by clicking Confirm.
Need Help? If you have questions about this process or any other feature, our support team is here for you. We can assist with troubleshooting, integration planning, and optimization.