
User Roles & Permissions
How to structure access to the Localpayment Business Portal and APIs. Built-in roles, custom roles, and a recommended least-privilege model for payments operations.
Use role-based access control to grant the right level of access to team members across the Localpayment Business Portal and operational APIs. The Business Portal provides a set of built-in role profiles you can assign directly, and you can also define your own custom roles with granular permissions.
Available Roles
ACCOUNT MANAGER
Can set up the merchant account and has access to the reports, balance, and business portal.
This user is unable to use the Localpayment API.
Details:
- View Balance.
- Configurations:
- View and edit Clients
- View and edit Users
- View Masters
- View Countries
- View Currencies
- View Banks
- View Concept Codes
- View Holidays
- View Document Types
- View and edit Clients
- Business Portal:
- View Clients.
- Reports:
- Clients
- View Activity
- View Balance
- View Fides
- View Subscriptions.
- Clients
ADMIN
Can create and authorize (if applicable) payouts, payins, refunds, chargebacks, virtual accounts, currency exchange, internal transfers, and settlement; as well has access to reports, balance, and business portal.
Details:
- Enabled API.
- View Balance.
- Configurations:
- View and edit Clients
- View and edit Users
- Management
- View Information
- View Account Settings
- View and edit Banking
- View and edit Contacts
- View and edit Roles
- View and edit Users
- View and edit Ip Whitelist
- View Merchants
- View and edit Notifications
- View Agreements
- View and edit BINS
- View Masters
- View Countries
- View Currencies
- View Banks
- View Concept Codes
- View Holidays
- View Document Types
- View and edit Clients
- Business Portal:
- View Clients.
- Payins
- View, create, and authorize Manual Payins
- View and create Virtual Accounts
- View and execute Chargebacks
- View, create, and authorize Refunds
- View Proof of Payment (POP)
- Checkout
- View Web Checkout and execute Template
- View Link Payment
- View Items
- View Iframe
- View and execute Smart Fields Api Keys
- View appearance
- Payouts
- View, create, and authorize Manual Payouts
- View Proof of Payment (POP)
- Reports:
- Clients
- View Activity
- View Balance
- View Fides
- View Subscriptions.
- Export Reports
- Clients
- Settlement & Exchange
- View, create, and edit Internal transfer
- View and create Currency exchange
- View, create, and edit Wire in
- View, create, and edit Wire out
API USER
Has full access to the Localpayment APIs.
This user is unable to use the Localpayment Business Portal.
Details:
- Enabled API.
AUTHORIZER LEVEL 1
Can authorize payouts, refunds, and settlements; create currency exchanges and internal transfers; and has access to reports, balance, and the business portal.
This user is unable to use the Localpayment API.
Details:
- View Balance.
- Business Portal:
- View Clients.
- Payins
- View and authorize Refunds
- View Proof of Payment (POP)
- View and authorize Refunds
- Payouts
- View and authorize Manual Payouts
- View Proof of Payment (POP)
- Reports:
- Clients
- View Activity
- View Balance
- View Fides
- View Subscriptions.
- Clients
- Settlement & Exchange
- View, create, and edit Internal transfer
- View and create Currency exchange
- View and edit Wire in
- View and edit Wire Out
AUTHORIZER LEVEL 2
Can authorize payouts, refunds, and settlements; create internal transfers; and has access to reports, balance, and the business portal.
This user is unable to use the Localpayment API.
Details:
- View Balance.
- Business Portal:
- View Clients.
- Payins
- View and authorize Refunds
- View Proof of Payment (POP)
- View and authorize Refunds
- Payouts
- View and authorize Manual Payouts
- View Proof of Payment (POP)
- Reports:
- Clients
- View Activity
- View Balance
- View Fides
- View Subscriptions.
- Clients
- Settlement & Exchange
- View and create Internal transfer
- View and edit Wire in
- View and edit Wire Out
OPERATIONS CHARGEBACK LEVEL 1
Can create chargebacks and has access to reports, balance, and business portal.
This user is unable to use the Localpayment API.
Details:
- View Balance.
- Business Portal:
- View Clients.
- Payins
- View and execute Chargebacks
- Reports:
- Clients
- View Activity
- View Balance
- View Fides
- View Subscriptions.
- Clients
OPERATIONS CHARGEBACK LEVEL 2
Can create chargebacks and has access to reports, balance, and business portal.
This user is unable to use the Localpayment API.
Details:
- View Balance.
- Business Portal:
- View Clients.
- Payins
- View and execute Chargebacks
- View and create Refunds
- View Proof of Payment (POP)
- Payouts
- View and create Manual Payouts
- Reports:
- Clients
- View Activity
- View Balance
- View Fides
- View Subscriptions.
- Clients
- Settlement & Exchange
- View and create Internal transfer
- View and create Currency exchange
- View and create Wire out
OPERATIONS LEVEL 1
Can create payouts, payins, refunds, and settlement; as well has access to reports, balance, and business portal.
This user is unable to use the Localpayment API.
Details:
- View Balance.
- Business Portal:
- View Clients.
- Payins
- View and create Refunds
- Payouts
- View and create Manual Payouts
- Reports:
- Clients
- View Activity
- View Balance
- View Fides
- View Subscriptions.
- Clients
- Settlement & Exchange
- View and create Wire out
OPERATIONS LEVEL 2
Can create payouts, payins, refunds, chargebacks, virtual accounts, internal transfers, and settlement; as well has access to reports, balance, and business portal.
Details:
- Enabled API.
- View Balance.
- Business Portal:
- View Clients.
- Payins
- View and create Virtual Accounts
- View and execute Chargebacks
- View and create Refunds
- View Proof of Payment (POP)
- Payouts
- View and create Manual Payouts
- View Proof of Payment (POP)
- Reports:
- Clients
- View Activity
- View Balance
- View Fides
- View Subscriptions.
- Clients
- Settlement & Exchange
- View and create Internal transfer
- View and create Wire in
- View and create Wire out
RECONCILIATION LEVEL 1
Has access to activity and subscriptions reports.
This user is unable to use the Localpayment API.
Details:
- Reports:
- Clients
- View Activity
- View Subscriptions.
- Clients
RECONCILIATION LEVEL 2
Has access to reports, balance, and business portal.
This user is unable to use the Localpayment API.
Details:
- View Balance.
- Business Portal:
- View Clients.
- Payins
- Refunds
- View Proof of Payment (POP)
- Refunds
- Payouts
- View Proof of Payment (POP)
- Reports:
- Clients
- View Activity
- View Balance
- View Fides
- View Subscriptions.
- Clients
TREASURY
Can create currency exchange, internal transfers, and settlement; as well has access to reports, balance, and business portal.
This user is unable to use the Localpayment API.
Details:
- View Balance.
- Business Portal:
- View Clients.
- Reports:
- Clients
- View Activity
- View Balance
- View Fides
- View Subscriptions.
- Clients
- Settlement & Exchange:
- View and create Internal transfer
- View and create Currency exchange
- View and create Wire out
Creating Custom Roles
If the built-in roles above don't match how you want to segment access, you can create your own custom roles and assign granular permissions per module.
Prerequisites
Before you begin, ensure you have:
Access Requirements
- Valid credentials for the Localpayment Business Portal
- User account with security settings permissions
Navigation Path
Side Menu → Configurations → Client → Edit → RolesStep-by-Step Guide
- Navigate to the Configurations module.
- Within Configurations, select the Clients section.
- Click the Edit option to open your account settings.
- In your account settings, locate and select the Roles tab.
- Click the ADD ROLE button.
- In the form that appears, fill in the role information:
- Type: This field is fixed as External and cannot be changed.
- Name : Enter a unique name for the role.
- Description : Provide a description for the new role.
- Permissions : Select at least one permission. Hover over any permission to see a tooltip with more details.
- Click Save. The new role will now be available to assign to your users.
Permissions List
Define the available permissions that can be assigned to a custom role. Each permission determines the level of access and actions a user can perform within specific modules of the Localpayment Panel.
- API: Grants access to API credentials, configuration, and integration tools.
- Balances: Allows viewing and monitoring of account balances across different currencies.
- Business Portal: Provides access to the main overview with key performance indicators and recent activity.
- Payin: Enables management of incoming payments, including viewing transaction details and initiating refunds.
- Payout: Grants control over outgoing payments, allowing users to initiate and manage fund transfers.
- Reports: Permits access to generate, view, and download financial and operational reports. Includes the following sub-permissions:
- Clients: Access to client-level reports, including activity, balance, Fides, and subscriptions.
- Historical: Access to historical transaction and movement reports.
- Export: Allows exporting report data to a file. This sub-permission is available only to users with the built-in ADMIN role or custom roles where it has been explicitly granted.
- Settlement - Exchange: Allows viewing and managing settlement details and currency exchange operations.
- Configurations: Provides access to general platform settings, merchant profiles, and other global configurations.
Managing Your Roles
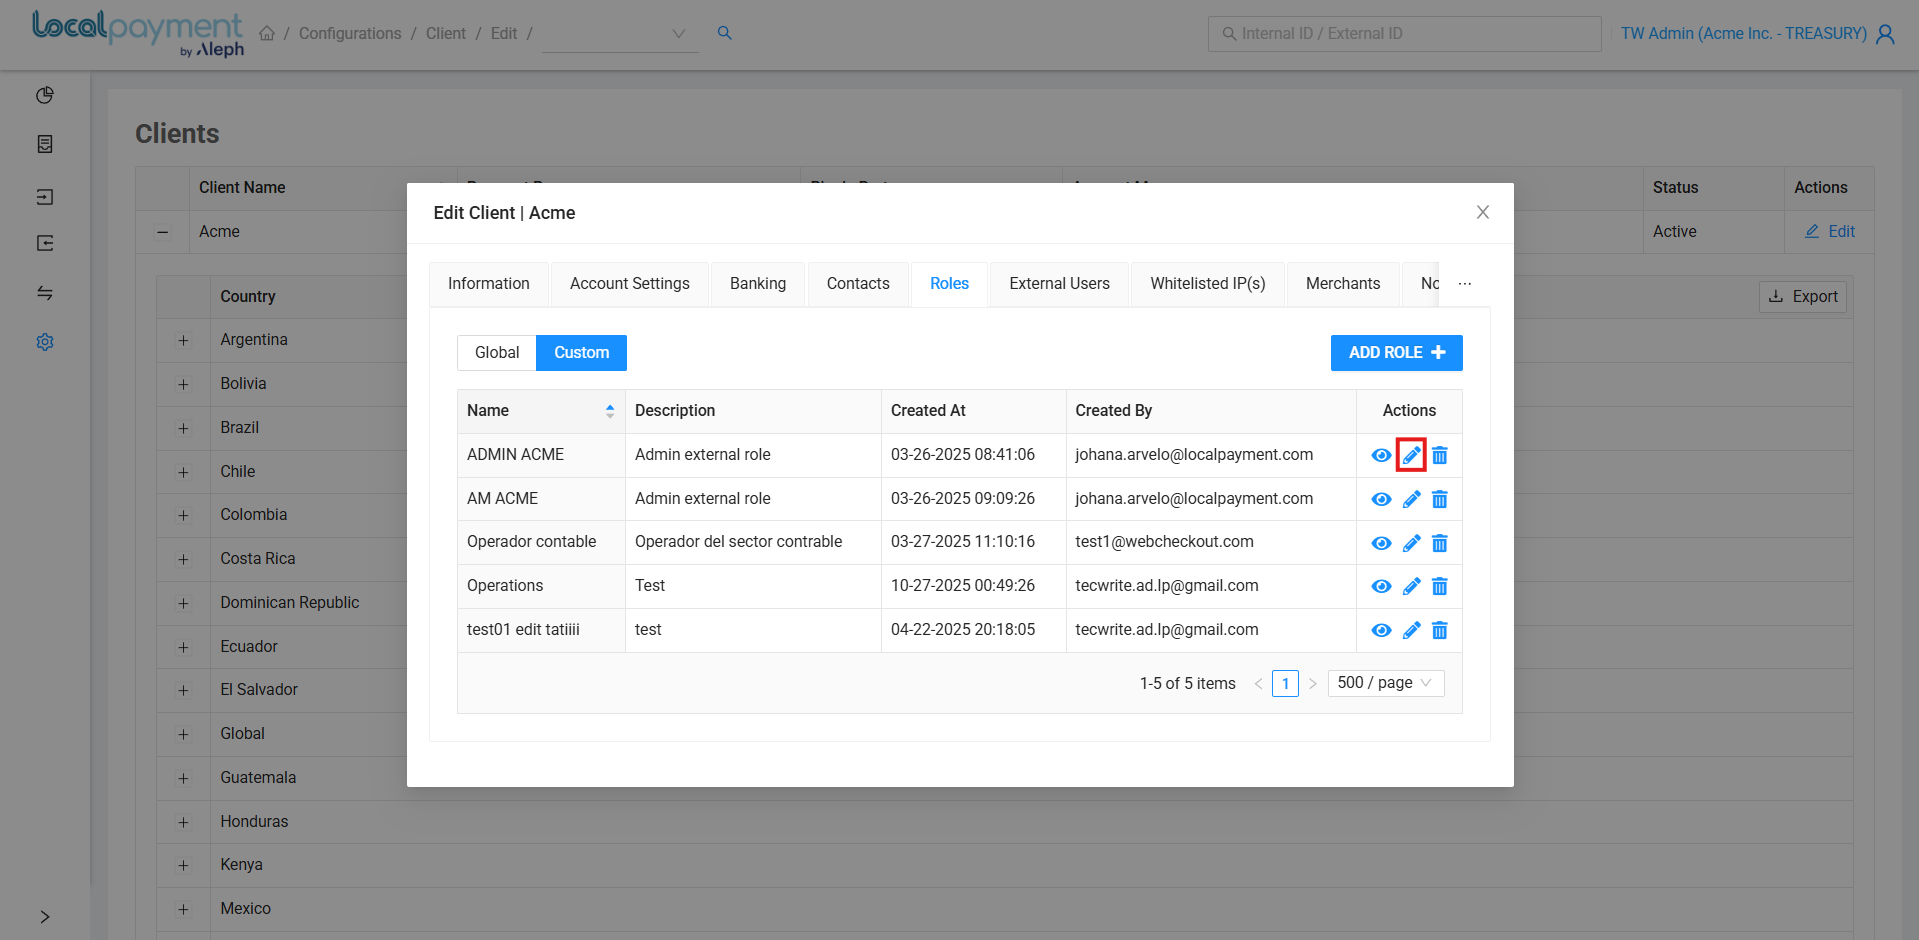
Modifying Existing Role
- Click the Edit Role icon for the desired role
- Update the role's name, description, and permissions as needed.
- Click Save to apply the changes.
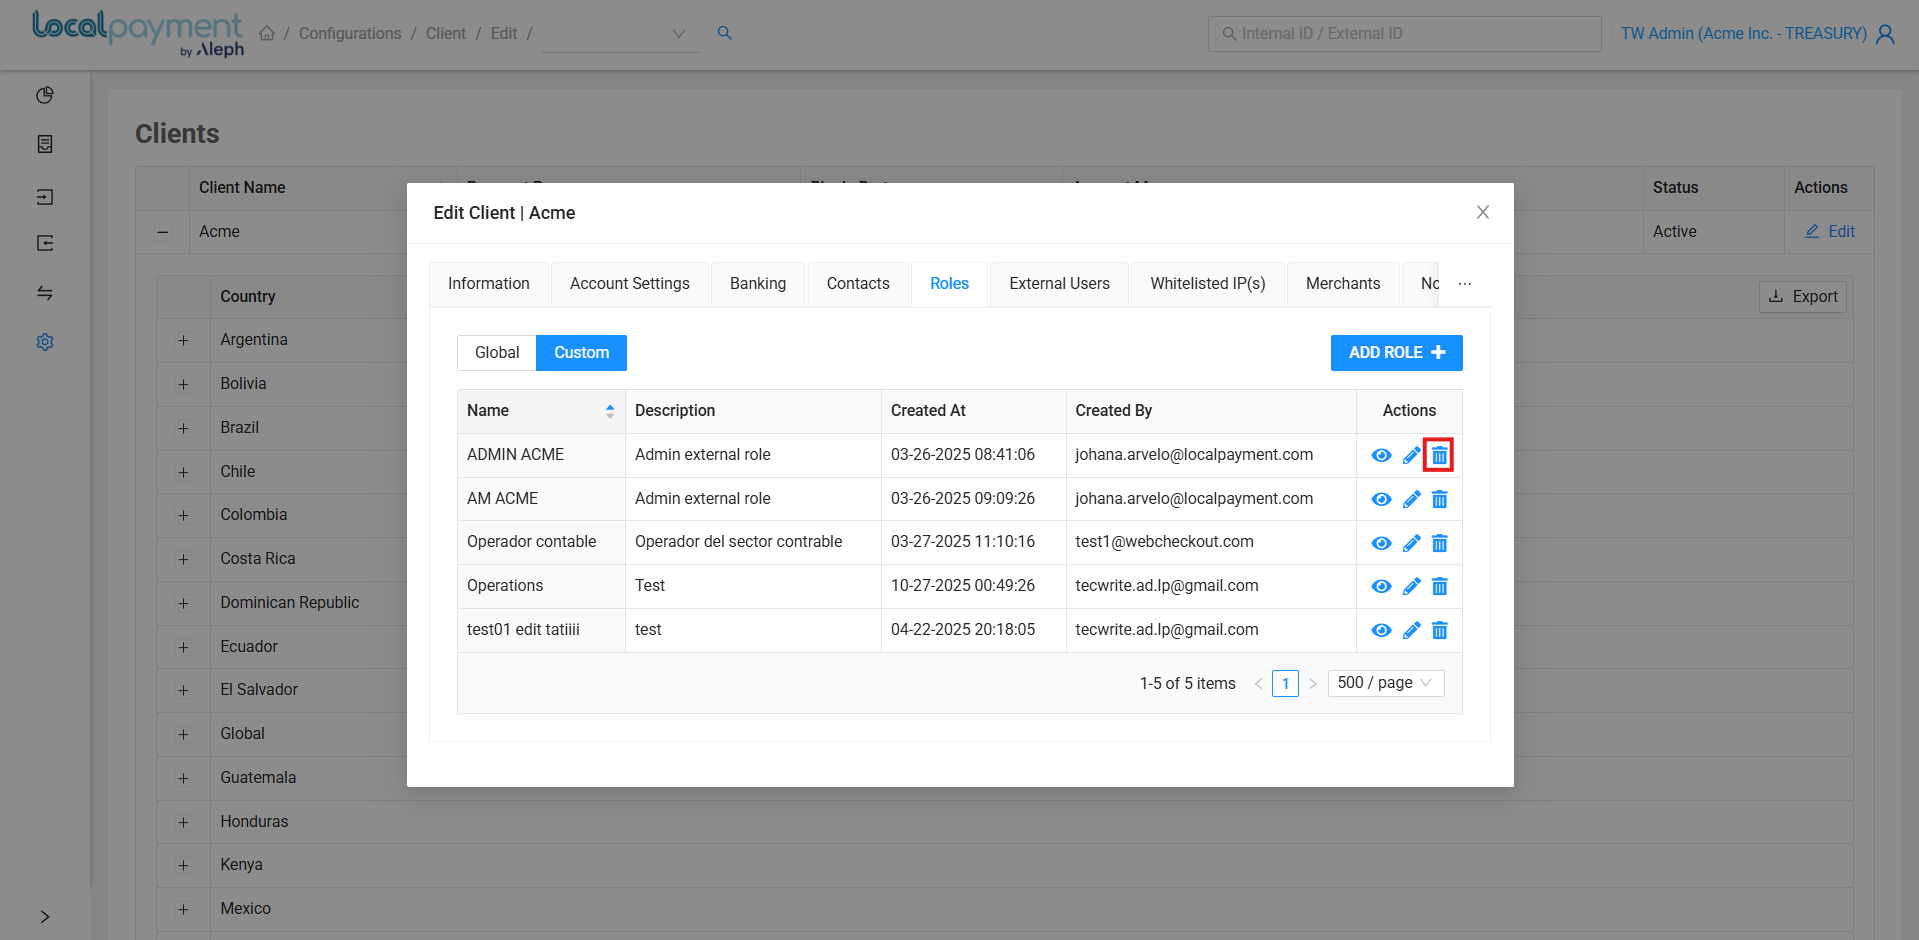
Removing Role
- Click the Delete Role icon next to the desired role.
- Confirm the action by clicking Yes.
Important
Before deleting a role, ensure that it is not currently assigned to any active user to prevent access issues.
Updated 3 months ago